Eiffel Tower Steps to Draw
Built in 1887, the Eiffel Tower is a wrought-iron lattice tower in Paris, France. Until now, it is still one of the most popular landmarks in the world.
Let's admit it—we're all dreaming to see the Eiffel Tower up close and personal one day. But in the meantime, while we're still waiting for that day to come, why not draw an Eiffel Tower and display the artwork inside your house?
We have crafted a step-by-step tutorial on how to draw an Eiffel Tower. These steps are extremely easy to follow, it doesn't matter if you're a beginner or an expert in drawing.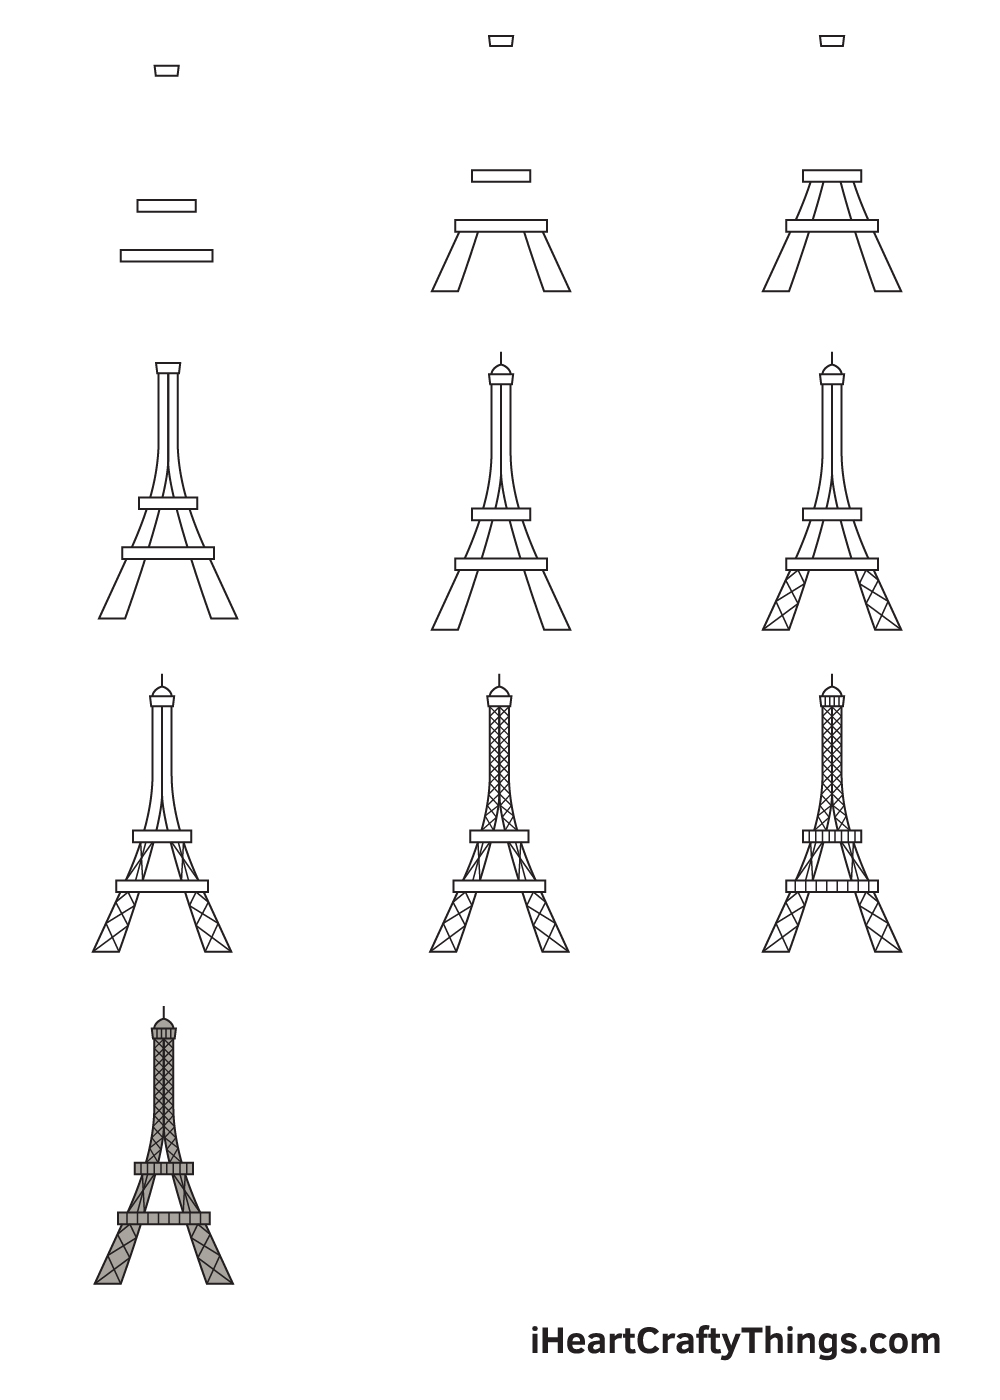
Each comprehensive instruction comes with detailed illustration. So whether you learn best through words or pictures, we're sure you can draw an Eiffel Tower with the help of this tutorial!
The most fun part about this tutorial is that you can customize the drawing as much as you like! You can even use a unique set of colors to make the Eiffel Tower look more vibrant and colorful.
Feel free to let your imagination run wild and unleash your inner creativity! With this all-inclusive drawing tutorial, the mesmerizing Eiffel Tower is right at your fingertips!
Have fun drawing a realistic-looking Eiffel Tower!
What's in this Blog Post
- How to Draw an Eiffel Tower — Let's get started!
- Step 1
- Step 2 — Construct the First Level of the Tower
- Step 3 — Move On to the Tower's Second Level
- Step 4 — Complete the Structure of the Eiffel Tower
- Step 5 — Draw the Pointed Figure at the Very Top
- Step 6 — Add the First Level's Criss-Cross Iron Poles
- Step 7 — Next, Add Details on the Second Level
- Step 8 — Now, Add Details on the Topmost Level
- Step 9 — Afterwards, Add Details on the Platforms
- Your Eiffel Tower Drawing is Complete!
How to Draw an Eiffel Tower — Let's get started!
Step 1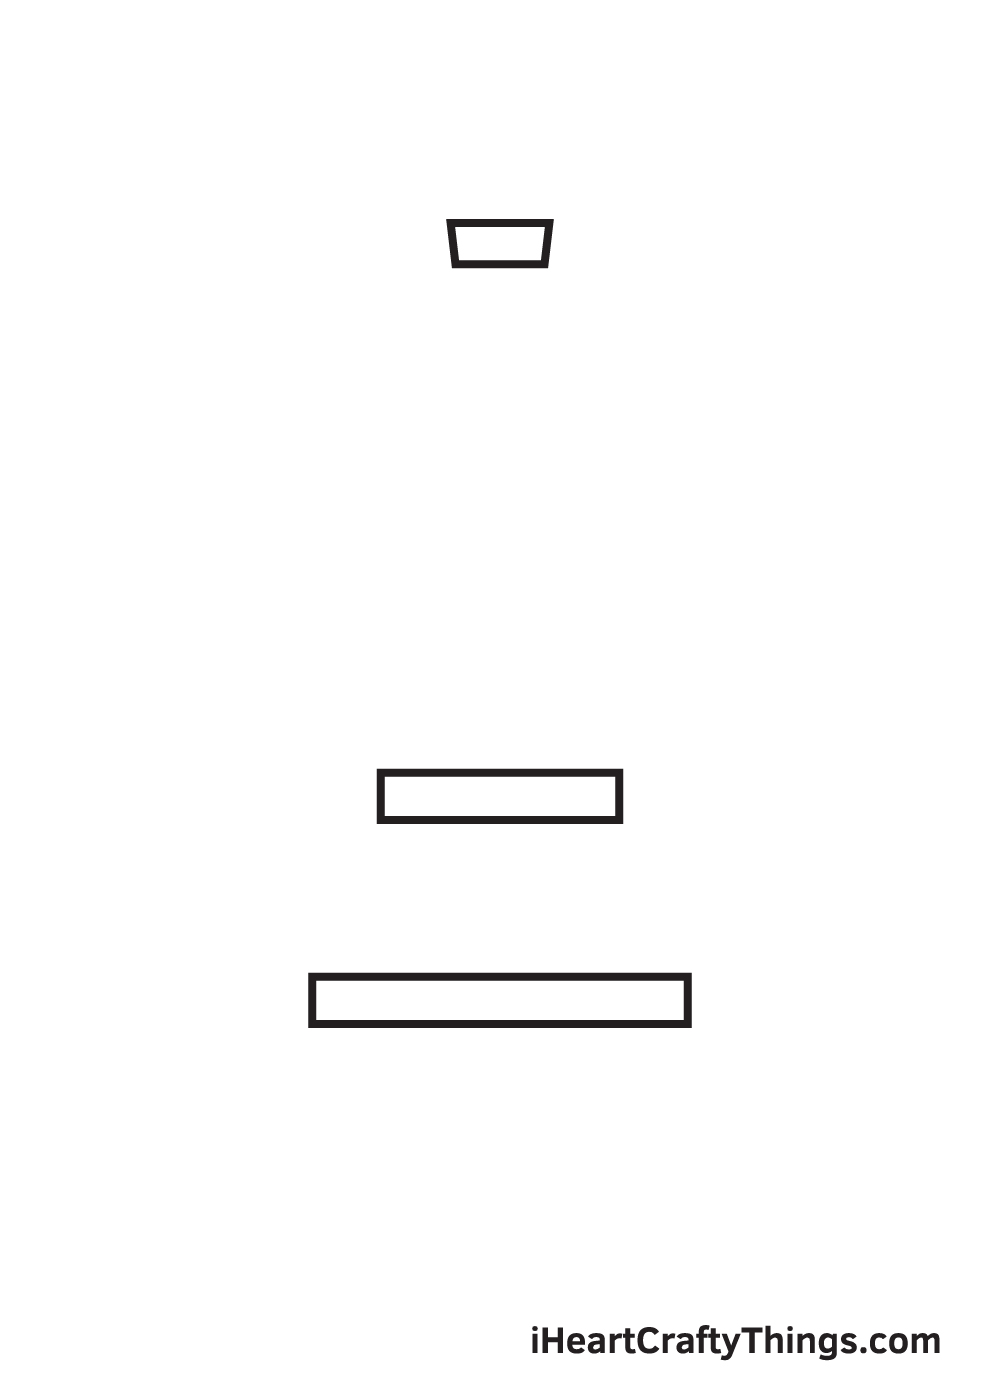
Starting on the middle of your paper, draw three narrow rectangular shapes in different sizes to outline the three platforms of the Eiffel Tower.
The rectangle at the top should be the smallest one while the one at the bottom should be the biggest.
Make sure that the Eiffel Tower will be drawn in the center by drawing an intersecting horizontal and vertical line across your paper to create reference lines.
The vertical line in the middle of your paper is where you should draw all three platforms.
Step 2 — Construct the First Level of the Tower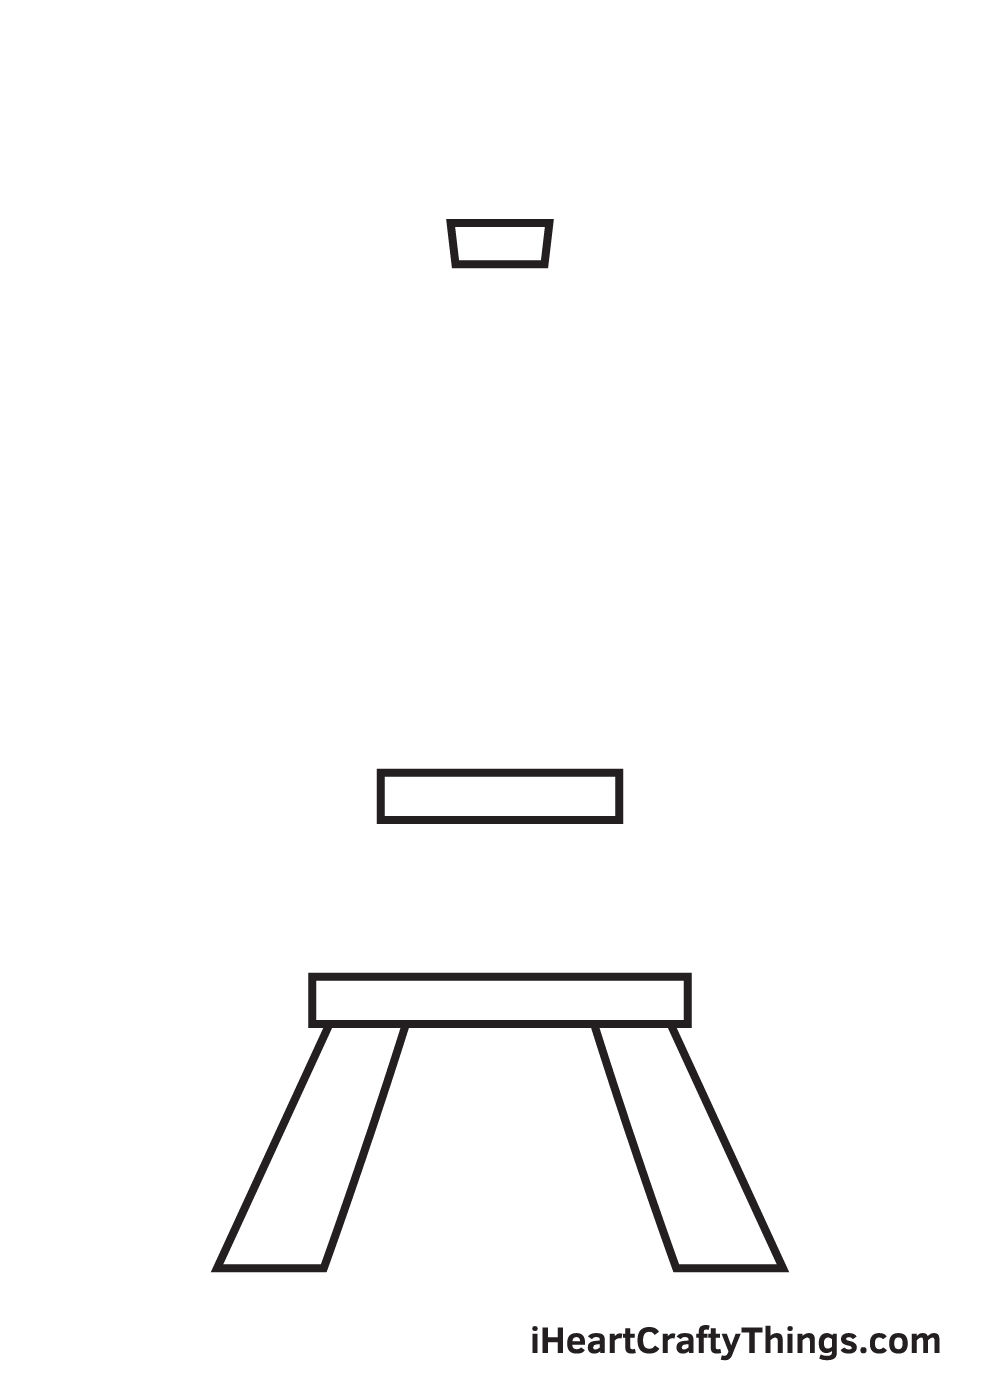
Create a diagonal leg on both sides underneath the first platform by drawing a pair of parallel diagonal lines with a horizontal line at the bottom.
This leg is the foundation that supports the entire weight of the Eiffel Tower.
Step 3 — Move On to the Tower's Second Level
Draw two parallel diagonal lines on each side in between the first and the second platform to create the tower's legs on the second level.
Step 4 — Complete the Structure of the Eiffel Tower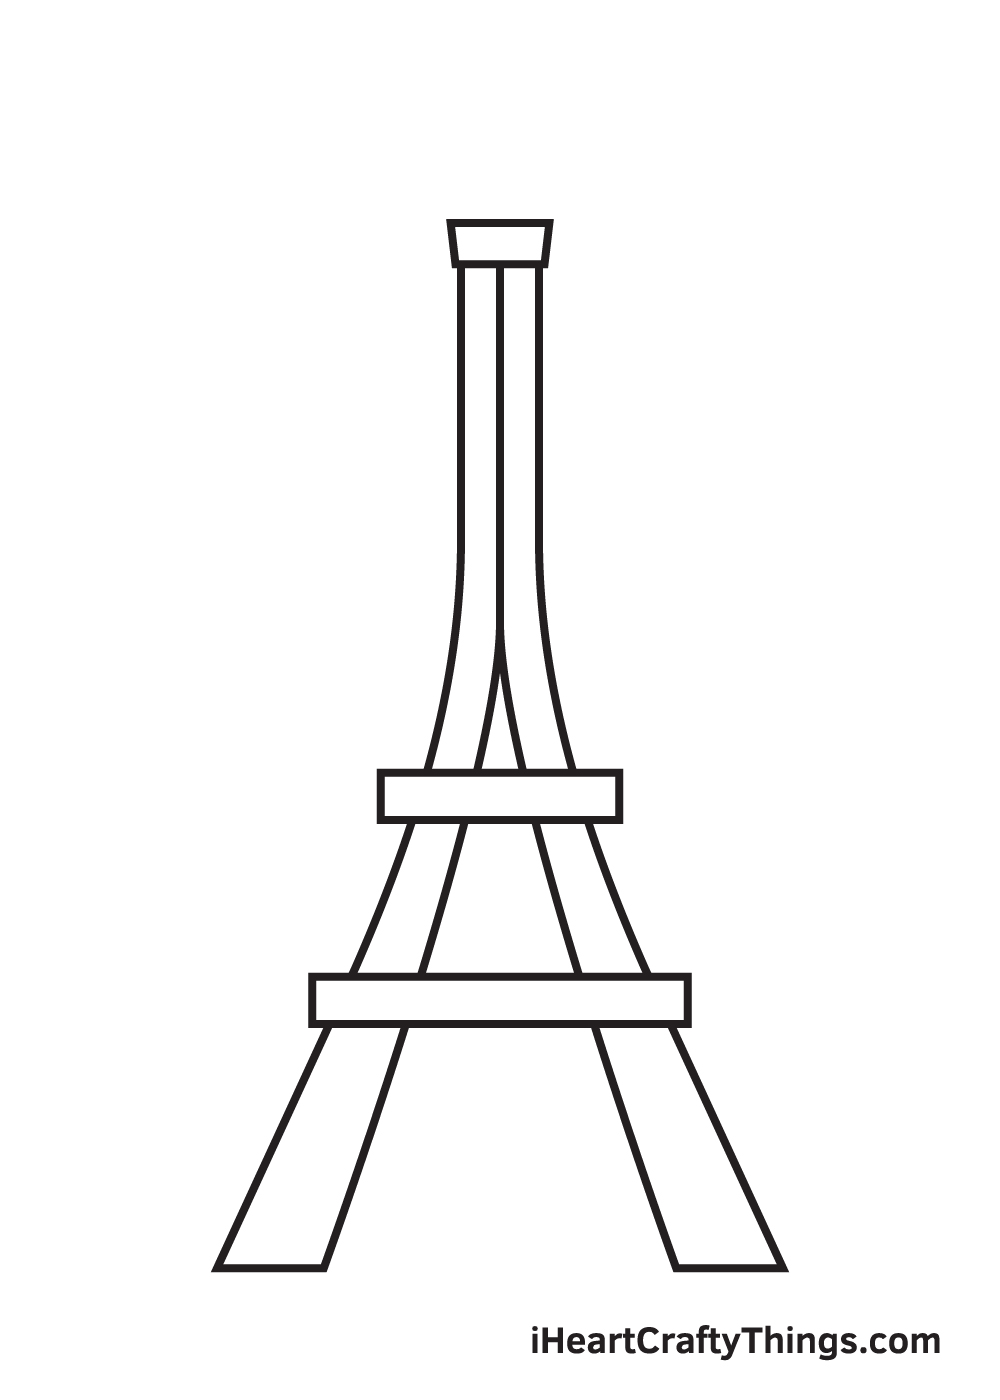
Finalize the form of the Eiffel Tower by drawing by structuring the topmost level of the Eiffel Tower. Simply draw parallel vertical lines that are slightly curved at the bottom.
Make sure that the leg in each level is perfectly aligned with each other to structure the Eiffel Tower proportionally. When drawn correctly, the legs should form a capital letter "A", as shown in the illustration.
Step 5 — Draw the Pointed Figure at the Very Top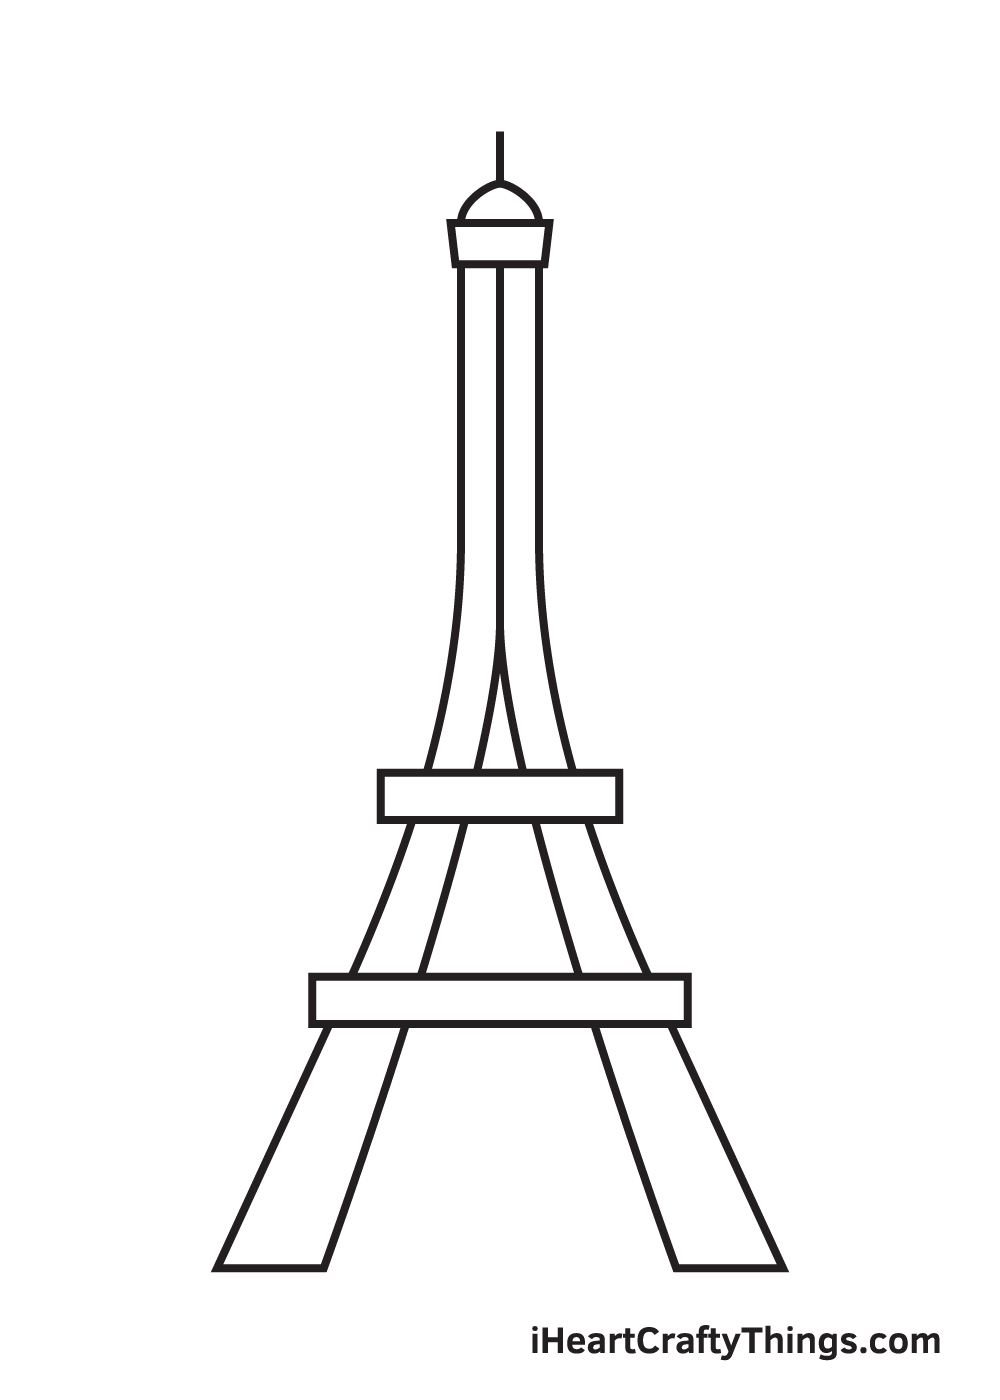
At the very top of the Eiffel Tower, draw a semicircle with a short vertical line above.
This creates the distinct figure situated at the topmost part of the Eiffel Tower.
Step 6 — Add the First Level's Criss-Cross Iron Poles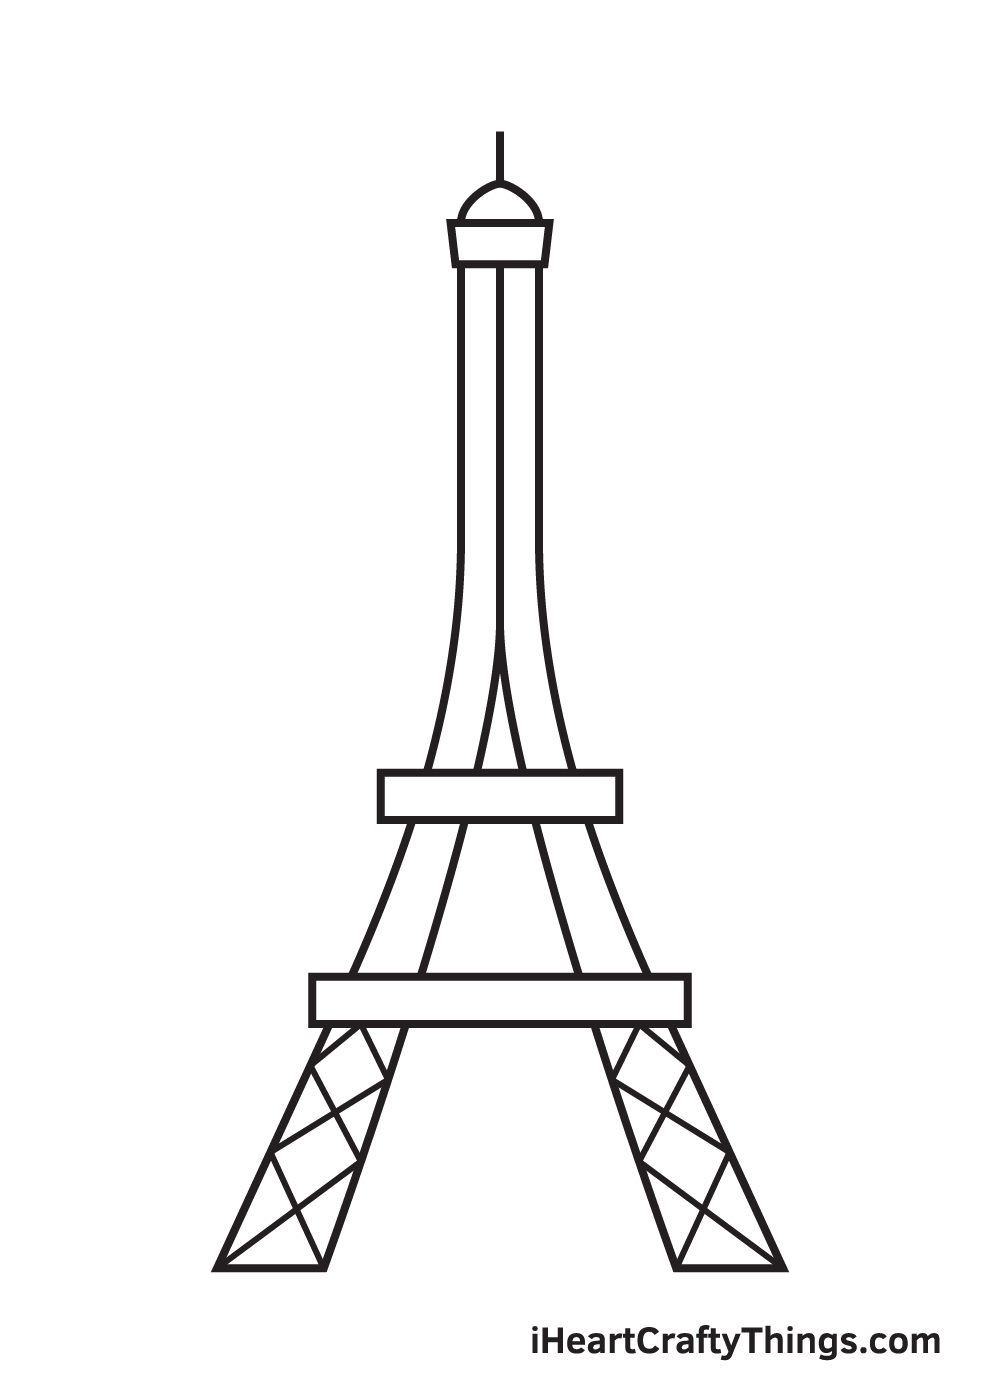
Add criss-cross patterns inside each bottom leg.
The criss-cross patterns can be created by simply drawing multiple intersecting diagonal lines.
Step 7 — Next, Add Details on the Second Level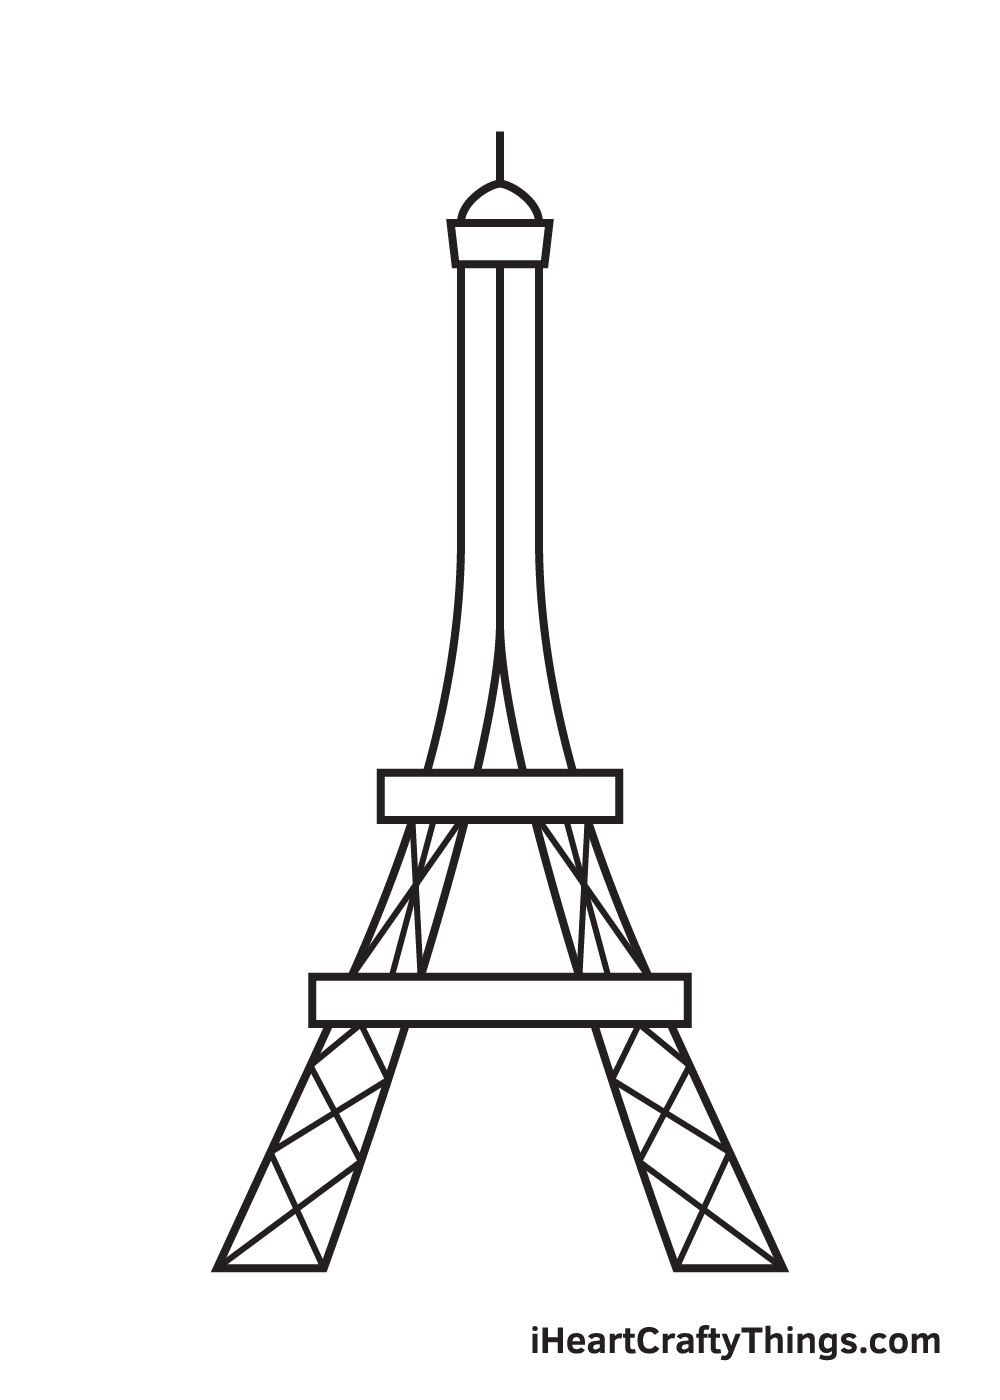
As you can see, the details on the second level are different from the details on the first level of the Eiffel Tower.
But no worries, creating this pattern is as easy as 1-2-3! It is simply a combination of a vertical line and intersecting diagonal lines.
Start by drawing a vertical line inside each leg in the second level. Afterwards, draw intersecting diagonal lines over the vertical line. And there you have it!
Step 8 — Now, Add Details on the Topmost Level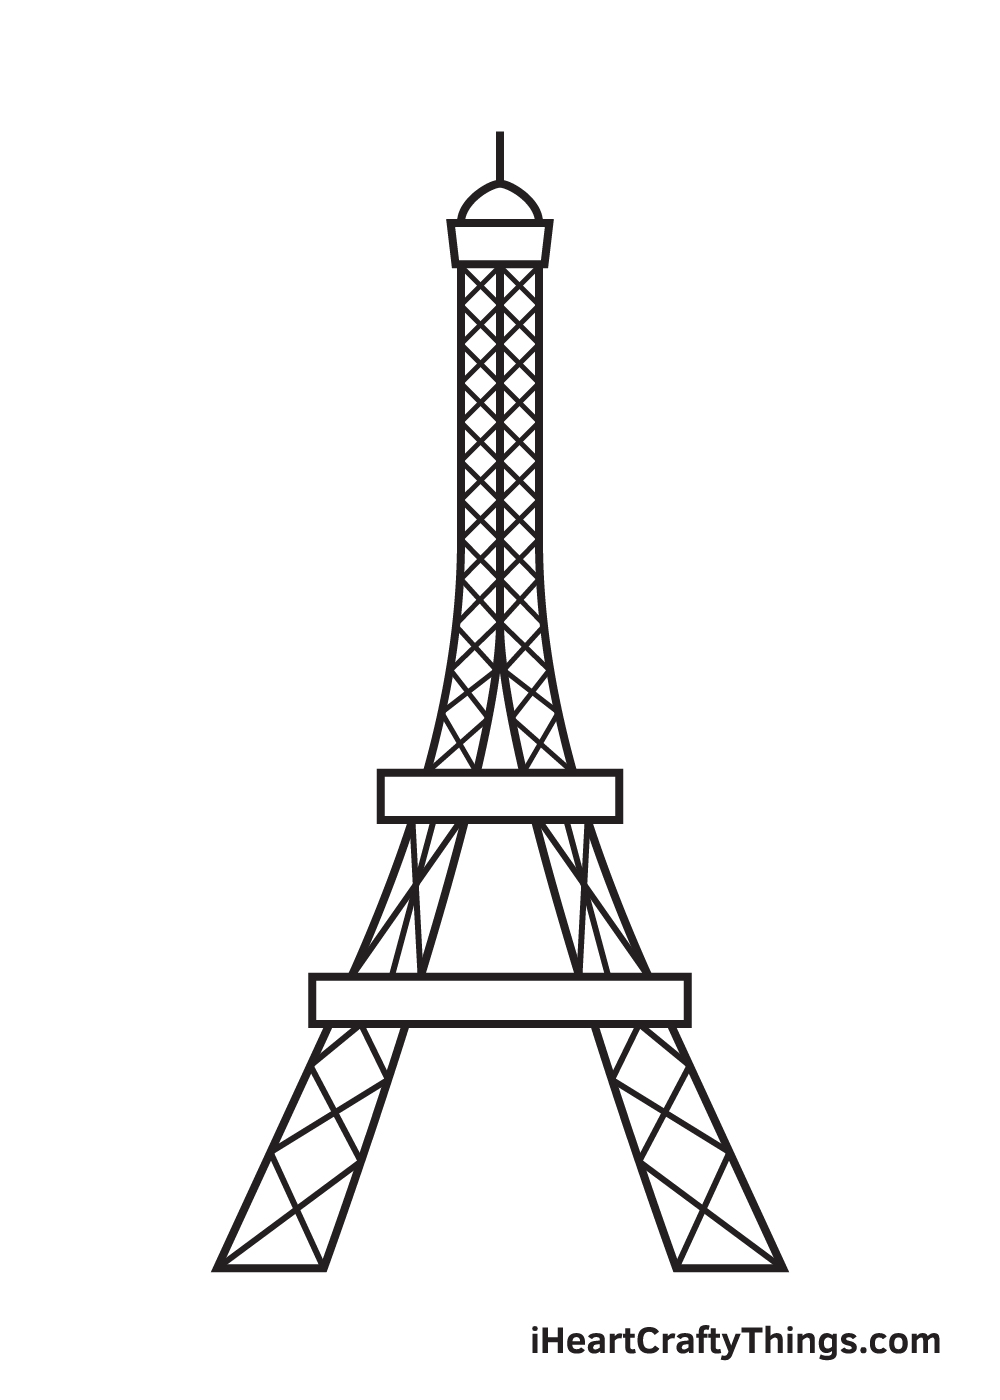
The details on the topmost level are identical to the ones at the bottom. Draw multiple intersecting diagonal lines forming a letter "X" down the length of each leg at the top.
After finishing this step, the details on the legs in all three levels of the Eiffel Tower should not be complete.
Step 9 — Afterwards, Add Details on the Platforms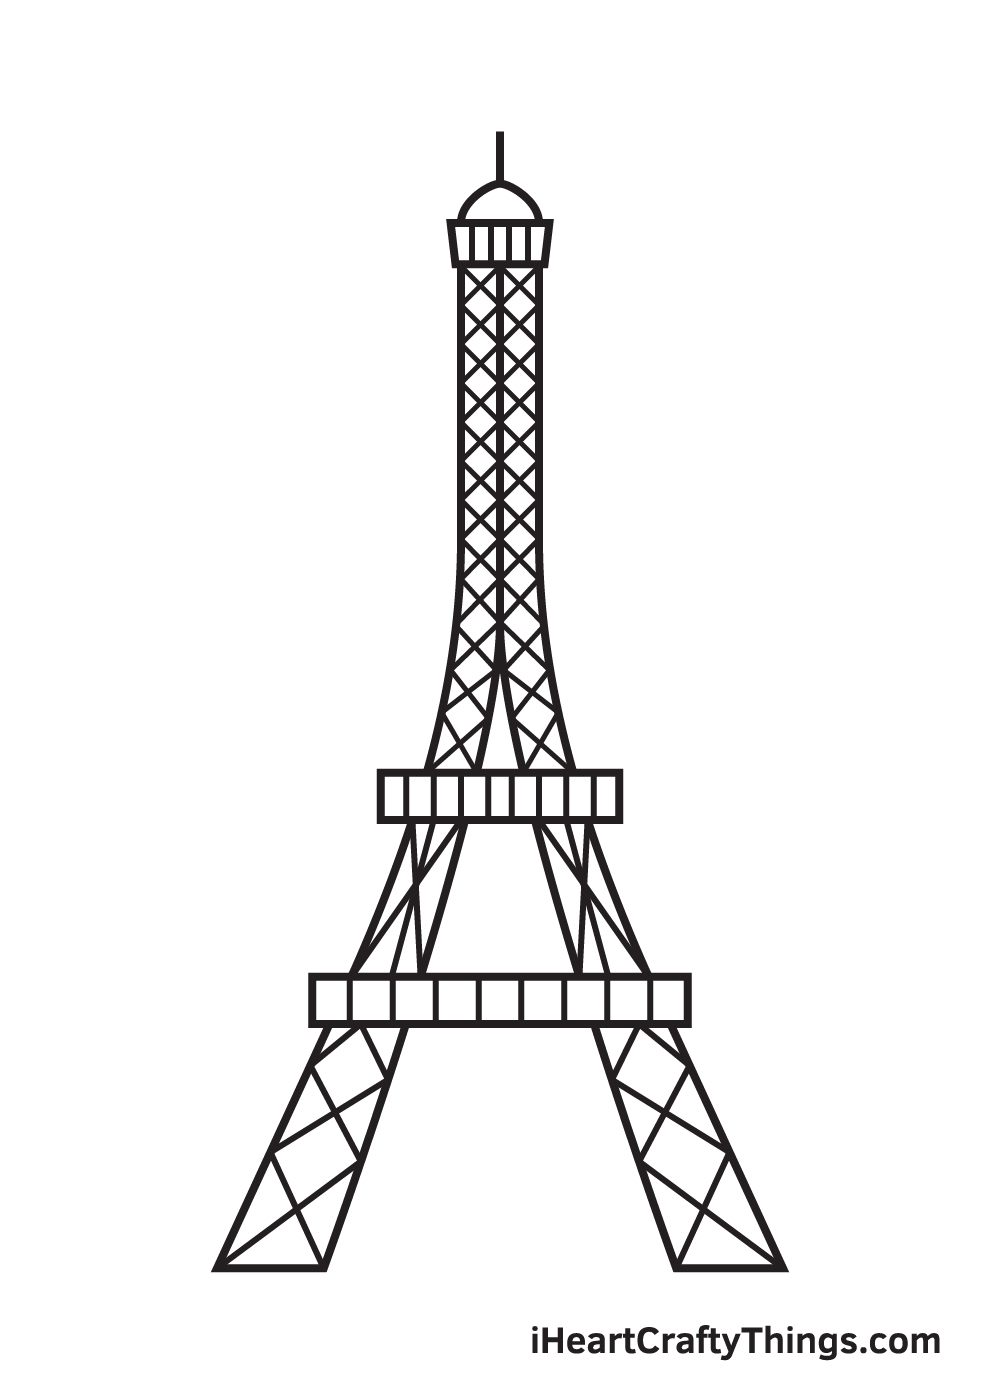
Since we've already finished creating the patterns of the tower's legs. In this step, we will now be working on the patterns on the horizontal platforms.
Draw multiple parallel vertical lines inside each of the platforms. Keep repeating this step until all three platforms have a similar pattern.
Now that we have successfully drawn a high-rise Eiffel Tower, it's time for the most enjoyable part, which is picking the colors and coloring your drawing!
Since the Eiffel Tower is made of iron, its natural brown color has changed over the years. It started out as reddish-brown and later turned to yellow-brown.
You can opt to color the Eiffel Tower exactly as it is, or pick your own unique set of colors. We definitely recommend doing the latter to make the most out of your experience.
You can even use more than one color to make your version of the Eiffel Tower stand out!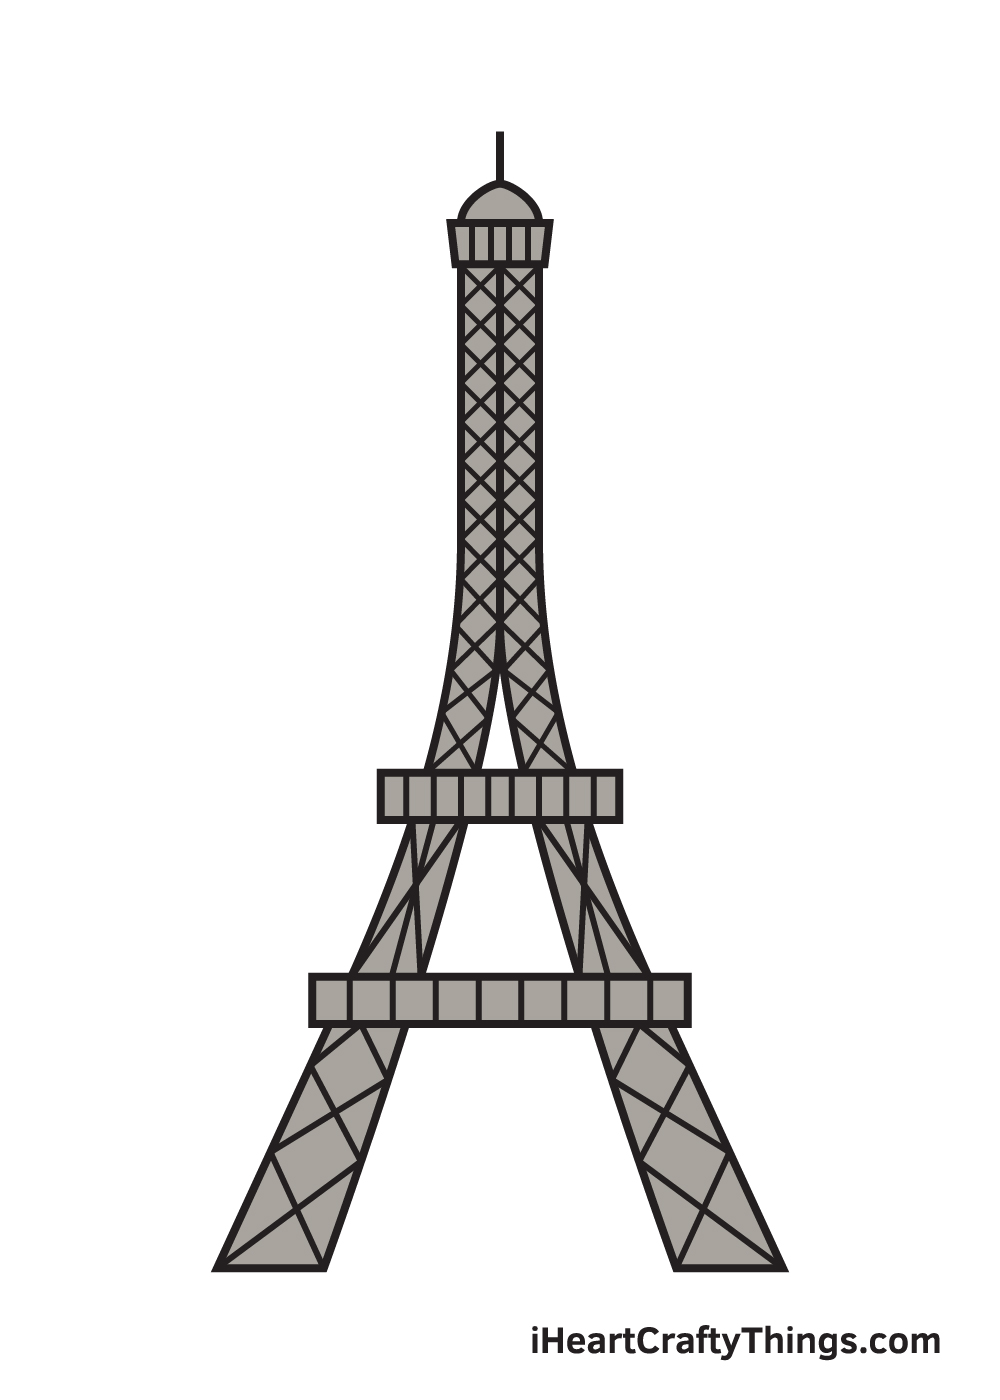
Your Eiffel Tower Drawing is Complete!
There you have it—you have successfully drawn and colored a spectacular Eiffel Tower. We think your drawing would look amazing to be hung up on a wall once it is framed!
It will surely make an awesome decoration for your living room. What do you think? In which part of your house do you think this artwork would look best?
Remember, we are always updating our catalog of "How-to-Draw" series. Make sure you keep re-visiting our website to continuously enjoy all-new drawing tutorials.
All of our crafts, printable sheets, and guides are 100% free for you to use. You may also want to share this with your friends so you can all learn how to draw together. How fun is that?!
Don't forget to take a picture of your artworks and show it off by sharing it on our Facebook page and on Pinterest.
Grab the opportunity to showcase your artistic skills and check out other people's drawings too. Come on, don't be shy!
You've worked so hard for it, so we're sure it looks incredible. Share your artwork and let the world appreciate your talent.
We can't wait to see your colorful Eiffel Tower drawing!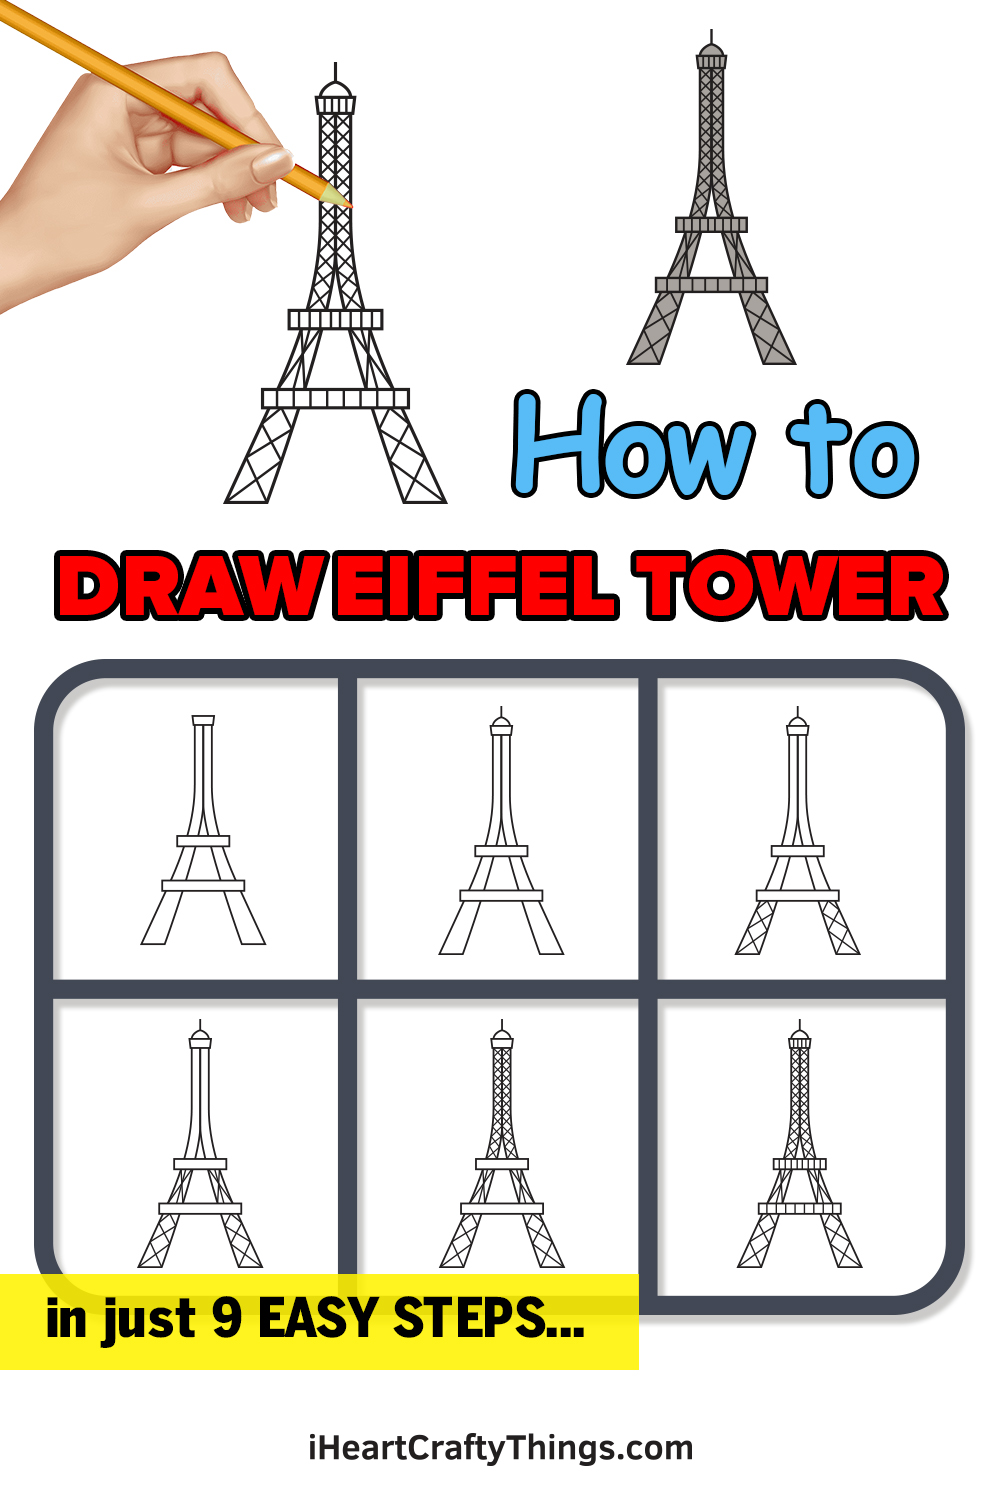
Source: https://iheartcraftythings.com/eiffel-tower-drawing.html
0 Response to "Eiffel Tower Steps to Draw"
Post a Comment